Sponsored

Recent Blog Entries

  • Rajabandot telah menjadi salah satu platform hiburan digital yang semakin populer di Indonesia. Dengan berbagai fitur menarik, Rajabandot menawarkan pengalaman togel online bagi para pengguna yang ingin menikmati konten digital dengan cara yang lebih praktis dan menyenangkan. Platform ini tidak...
  •   For first, there was only ever one brand in contention:. But on the contrary, the er controls clicked with users. We have loved every minute: the The Row Handbag Outlet people, the energy, the music, the beach vibes. Yas is almost like three different characters this time, and it's very much...
  • Looking for the best real money casinos UAE where you can play exciting games and win real cash? Finding the right platform matters — especially when you want secure play, fair odds, and fast payouts. From slot machines to live dealer tables, the best real money casino sites offer a huge varie...
View All

Sponsored

Microsoft Outlook 2010 setup

  • Setup POP3/IMAP email account with Microsoft Outlook 2010


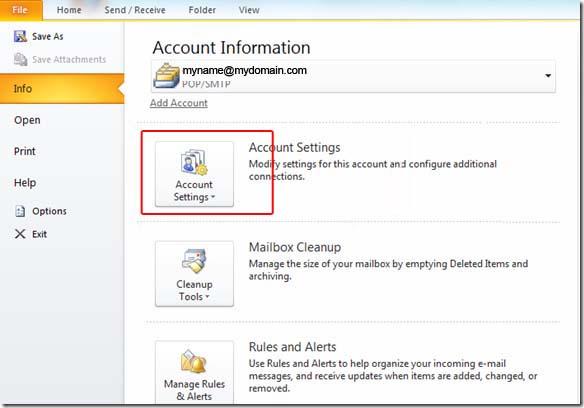
    STEP 1:   Open Microsoft Outlook 2010 and select File > Account Settings...


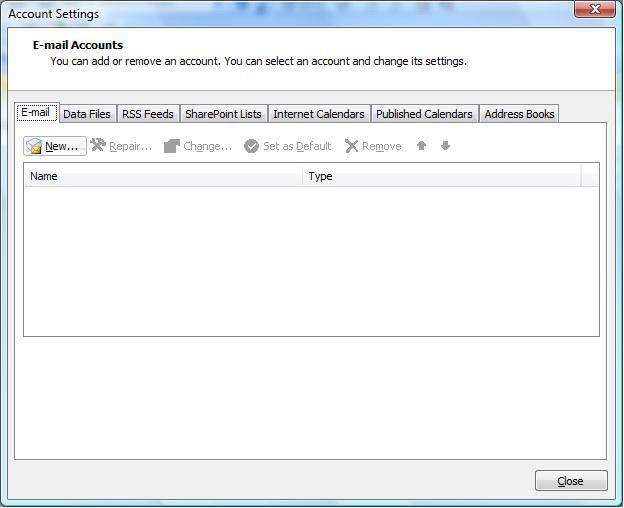
    STEP 2:   E-mail Accounts: Click the "New" button under the "Email" tab.


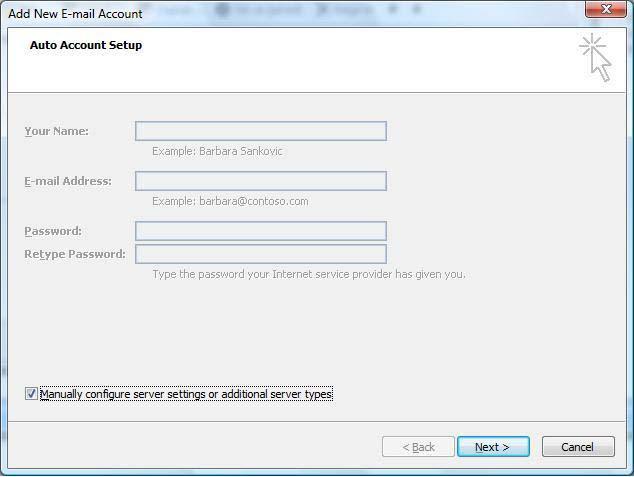
    STEP 3:   Auto Account Setup: Select "Manually configure server settings or additional server types".


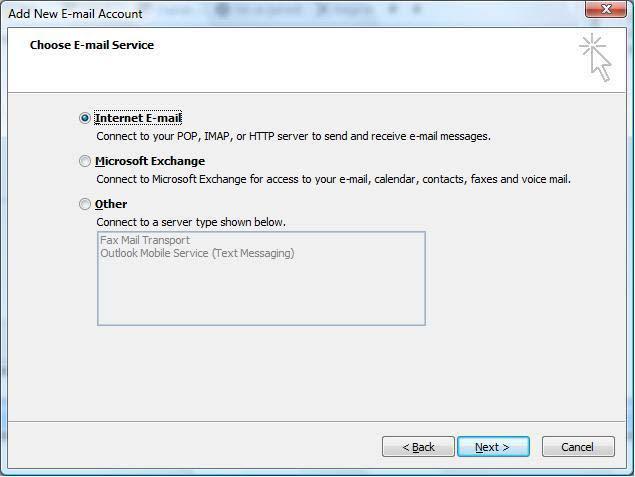
    STEP 4:   Choose E-mail Service: Select "Internet Email".


    The following informations are required::

    • Your Name: Your Full Name
    • Your full email address:
    • Incoming mail server (POP3): mail.yourdomain.com
    • Outgoing mail server (SMTP): mail.yourdomain.com
    • User Name: Your full email address
    • Password: The one you specified in your control panel when creating your email account


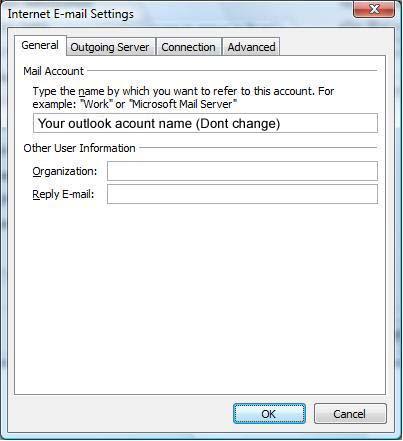
    STEP 5:   Once your settings look like the settings shown in this screenshot, click on the "More Settings..." button in the bottom right hand corner.


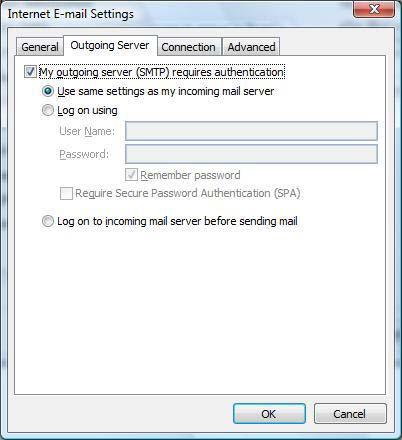
    STEP 7:   Internet E-mail Settings: Click the "Outgoing Server" tab at the top of the screen and Put a checkmark in "My outgoing server (SMTP) requires authentication" and make sure that the dot is in "Use same settings as my incoming mail server".


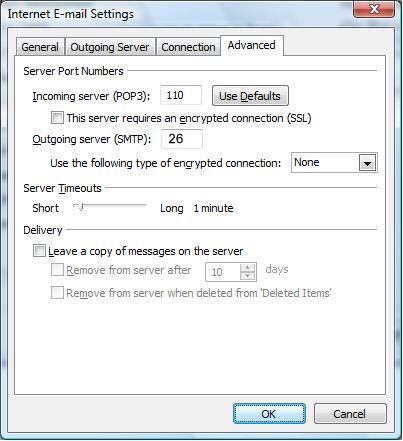
    STEP 8:   Advanced: Click on the "Advanced" tab at the top.

                   For Incoming Server (POP3): 110 and Outgoing Server (SMTP): 26


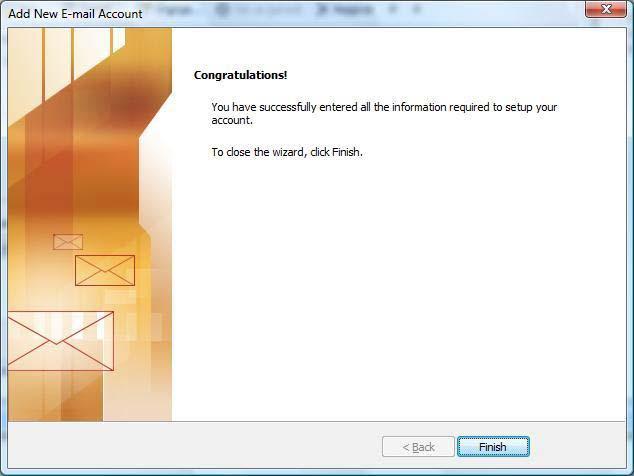
    STEP 9: Click the "OK", "Next" and then


    NOTE: As a courtesy, we provide information about how to use certain third-party products, but we do not endorse or directly support third-party products and we are not responsible for the functions or reliability of such products. Outlook® is a registered trademark of Microsoft Corporation in the United States and/or other countries. All rights reserved.

Comments

0 comments

Sponsored

Sponsors